Flooring is not only functional but also a significant aesthetic element in any space. Over time, wear and tear can lead to various issues like scratches, dents, and gaps. This guide explores DIY solutions to address these commonDIY Flooring Fixes problems effectively.
Introduction to DIY Flooring Fixes
Maintaining and repairing flooring issues promptly not only preserves the appearance of your space but also prolongs the lifespan of your flooring investment. DIY fixes can save costs and empower homeowners to tackle minor flooring problems without professional help.
1. Repairing Scratches and Surface Damage
Scratches and surface damage are common in hardwood, laminate, and vinyl flooring. Here's how to address them based on the flooring type:
Hardwood Flooring:
Minor Scratches:
- DIY Fix: Use a wood filler pencil or marker that matches the floor color. Apply it directly to the scratch, following the grain of the wood. Buff with a soft cloth to blend.
Deeper Scratches:
- DIY Fix: Clean the scratched area thoroughly. Apply wood filler with a putty knife, ensuring it fills the scratch completely. Allow it to dry, then sand lightly and apply a matching stain or finish.
Laminate and Vinyl Flooring:
Surface Scratches:
- DIY Fix: Use a laminate or vinyl repair kit, which typically includes colored putty or markers. Apply the putty or marker to the scratch, wipe off excess, and let it dry.
Deep Scratches:
- DIY Fix: For deeper scratches, use a filler compound from the repair kit. Apply, smooth with a putty knife, and let it dry. Sand lightly if necessary and apply a matching finish.
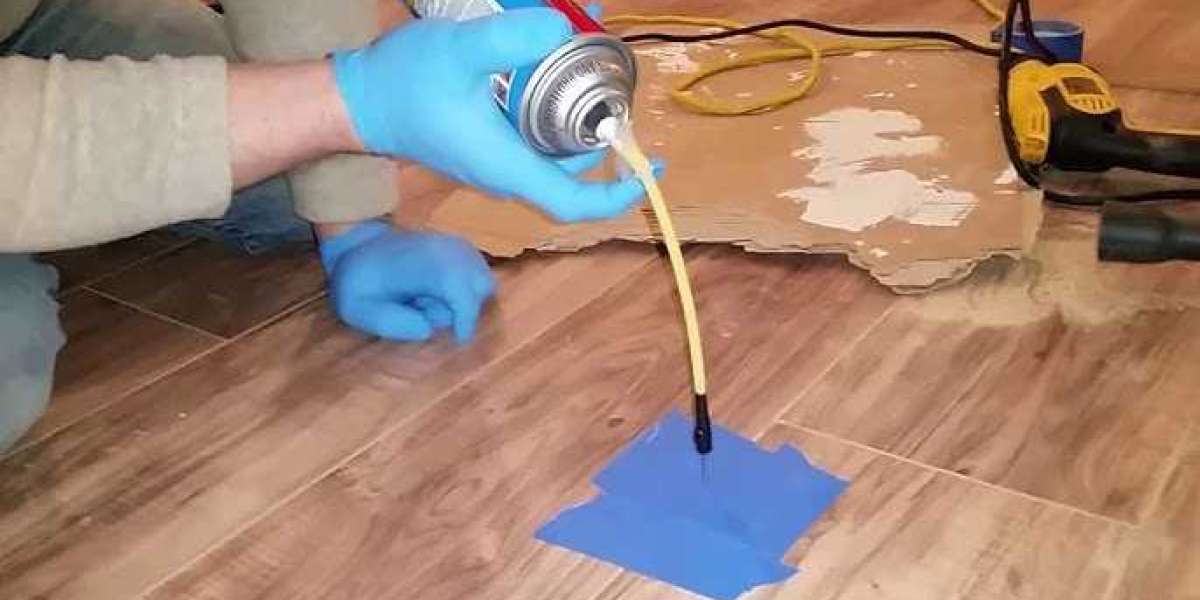
2. Fixing Gaps and Separations in Laminate Flooring
Laminate flooring can develop gaps or separations over time due to humidity changes or installation issues. Here’s how to fix them:
DIY Fix:
- Assess the Gap: Determine the size of the gap. For small gaps, gently tap the planks together using a tapping block and hammer. For larger gaps, apply wood glue along the edges before tapping together. Wipe off excess glue and weigh down the repaired area until dry.
3. Patching Damaged Tiles in Ceramic or Porcelain Flooring
Ceramic or porcelain tiles can chip or crack, especially in high-traffic areas. Repairing them can restore the appearance and prevent further damage:
DIY Fix:
Clean the Area: Remove debris and clean the damaged tile thoroughly.
Apply Epoxy or Tile Filler: Use epoxy adhesive or a tile repair filler to fill the chip or crack. Smooth the surface with a putty knife and allow it to dry completely.
Color Match: If needed, apply a matching paint or marker over the repaired area to blend with the tile’s color.
4. Addressing Squeaky Floors
Squeaks often occur due to loose floorboards or subflooring. Here’s how to silence those annoying squeaks:
DIY Fix:
Locate the Squeak: Walk over the floor and pinpoint the squeaky area.
Secure the Subfloor: Use screws to secure loose subflooring to the floor joists. Be careful not to over-tighten, as it may damage the flooring above.
Apply Lubricant: For squeaky hardwood floors, sprinkle powdered graphite or use a specialized lubricant between the boards to reduce friction.
5. Repairing Water Damage in Engineered Wood Flooring
Water damage can cause engineered wood flooring to swell or warp. Quick action is essential to prevent further damage:
DIY Fix:
Dry the Area: Use fans and dehumidifiers to dry the affected area thoroughly.
Sand and Refinish: Once dry, sand down the warped area gently. Apply a matching stain or finish to restore the appearance.
6. Handling Discoloration or Stains
Stains and discoloration can mar the beauty of any flooring type. Here’s how to tackle them effectively:
DIY Fix:
Identify the Stain Type: Determine if the stain is organic (like food or pet stains) or non-organic (like ink or dyes).
Use Suitable Cleaners: Apply a suitable cleaner or stain remover for the type of stain. Test on a small, inconspicuous area first.
Blot and Rinse: Blot the stain with a clean cloth and rinse thoroughly with water. Repeat as necessary until the stain lifts.
7. Preventative Maintenance Tips
Preventing flooring issues is often easier than fixing them. Here are some tips to maintain your floors:
- Use Mats and Rugs: Place mats at entryways and high-traffic areas to trap dirt and prevent scratches.
- Regular Cleaning: Clean spills promptly and use recommended cleaning products for your flooring type.
- Trim Furniture Legs: Attach felt pads to furniture legs to prevent scratches and dents.
Conclusion
DIY flooring fixes empower homeowners to maintain and repair their floors effectively, saving time and money. By understanding common issues and applying appropriate solutions, you can preserve the beauty and functionality of your flooring for years to come. Whether it’s addressing scratches, gaps, or water damage, these DIY tips ensure your floors remain in top condition with minimal hassle